
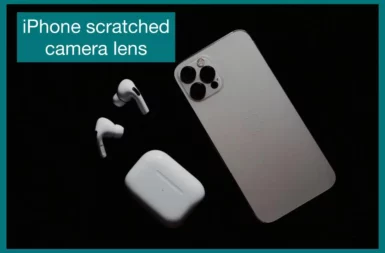
Are you struggling with a scratched iPhone camera lens? If yes, then dont worry anymore!
In this article, we’ll examine the causes of lens scratches, review several fixes, and offer advice on guarding your iPhone camera lens from further harm. Let’s get into it.
Why is the iPhone Camera Lens Scratched?
There are several causes for the iPhone camera lens to scratch, including:
- Contact with abrasive surfaces: The lens may become scratched if it meets objects like coins, keys, or sandy terrain.
- Improper storage: Placing the iPhone in a pocket or bag with other items without any padding can cause friction and scratches.
- Debris and dust: When the lens is wiped or cleaned, accumulated dust, sand, or debris on the surface may scratch the lens.
- Low-quality protective cases: Some low-quality cases could have protruding objects or rough edges that could scratch the lens.
- Inadequate lens protection: If lens covers or protectors are not used, the lens may become vulnerable to scratches.
How to Fix a Scratched iPhone Camera Lens?
Here are different methods that can help restore your iPhone’s camera lens to its original condition.
Method 1: Toothpaste
If the iPhone camera lens is lightly scratched, this can be fixed using toothpaste, a common household item.
Procedure:
- The scratched lens should first be treated by directly applying a small amount of toothpaste.
- Make gentle circular motions with a soft, lint-free cloth as you rub the toothpaste.
- Rub for a while longer while applying light pressure.

- With a fresh cloth, remove any extra toothpaste.
- If necessary, repeat the procedure.

Method 2: Water and Baking Soda
Another method is to use baking soda and water to remove scratches from the iPhone camera lens:
Procedure:
- Mix an equal quantity of water and baking soda in a small bowl to make a paste.
- A soft cloth or cotton swab should be used to apply the paste to the scratched lens.
- For a few minutes, gently rub the paste in a circular motion.

- The lens should be washed with water and dried with a fresh cloth.
- If necessary, repeat the procedure.

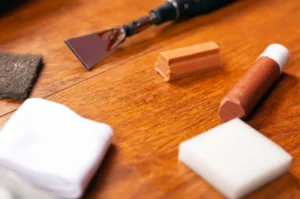
Method 3: Scratch Repair Kit
A scratch repair kit for glass surfaces might be a better choice if the scratches on your iPhone camera lens are more severe. These kits typically include different grits of sandpaper and a polishing compound:
Procedure:
- To start, use a microfiber cloth to clean the lens of any dust or debris.
- Follow the guidelines included with the scratch repair kit.
- Rub the lens in a circular motion using a soft cloth and the polishing compound.
- Use the provided sandpaper gradually, moving from the coarsest grit to finer grits.
- Clean a clean cloth to dry the lens after rinsing it with water.
Method 4: Rubbing Alcohol
Cleaning the iPhone camera lens with rubbing alcohol may help to lessen the visibility of minor scratches. This is how to apply it:
Procedure:
- Rub alcohol should be soaked onto a cotton swab or microfiber cloth.
- Focus your attention on the scratched areas as you gently wipe the lens in a circular motion.
- Rub for a few minutes more while using light pressure.

- Afterward, wipe away any leftover material with a clean cloth.
- If the lens is improved, evaluate it and repeat the process.

Method 5: Pencil Eraser
A pencil eraser can also be used to hide minor scratches on the iPhone camera lens.
Procedure:
- Utilize a microfiber cloth to ensure the lens is spotless and free of dirt or debris.
- Pick up a regular pencil with a fresh eraser.
- Circularly rubbing the eraser over the scratched areas is gentle.

- Rub for a while longer while periodically inspecting the condition of the lens.
- Once finished, wipe away any eraser residue with a clean cloth.
- If necessary, repeat the process.

Tips to Protect iPhone Camera Lens from Scratching
An iPhone’s camera lens is a delicate part that must be handled carefully to preserve its functionality and image quality. Here are some tips to prevent scratching of your iPhone camera lens:
1. Use a Protective Case
Invest in a high-quality case with a raised lip or a protective ring around the camera module if you want to protect your device. When the phone is placed face-down, this design element helps prevent the lens from directly touching surfaces.
2. Apply a Camera Lens Protector
Consider using a tempered glass or specialized film camera lens protector. These tiny shields offer an extra line of defense against scratches and can be easily changed if damaged.
3. Handle your iPhone Carefully
Be cautious and keep it away from sharp or abrasive surfaces. To lessen the chance of accidental scratches, keep it in a soft pouch or a different pocket when not in use.
4. Lens Cleaning
Use a microfiber cloth made for delicate surfaces to gently clean the camera lens. Avoid using sharp or abrasive materials that might scratch the lens.
5. Avoid Contact with Sharp Objects
Use caution when putting your iPhone in a bag or pocket with coins or sharp objects like keys. If these objects come into direct contact with the camera lens, they can easily scratch it.
Conclusion
An iPhone’s camera lens is at risk of scratches, which can lower the quality of the captured images. Several techniques can be used to remove minor blemishes and restore functionality.
Each approach presents a potential resolution, from toothpaste to specialized kits. Remember to be cautious and get professional help if you get severe scratches. You can get the camera lens on your iPhone back to working properly with the proper method.
You can also contact Apple support if you want your camera lens replaced. The replacement will be covered under warranty if it’s a manufacturing defect. If it’s not, you will have to pay for the replacement.